

In Microsoft Excel, consistency matters. It’s important for creating printable documents, financial reports, dashboards, and professional templates. Uneven cell sizes can clutter your spreadsheets. This makes them confusing and hard to read. The solution? Make your Excel cells the same size. This guide will show you what Excel cells are. You’ll learn how to make them the same size by adjusting both row height and column width. This simple change can greatly enhance your Excel workflow.
What Are Cells in Excel?
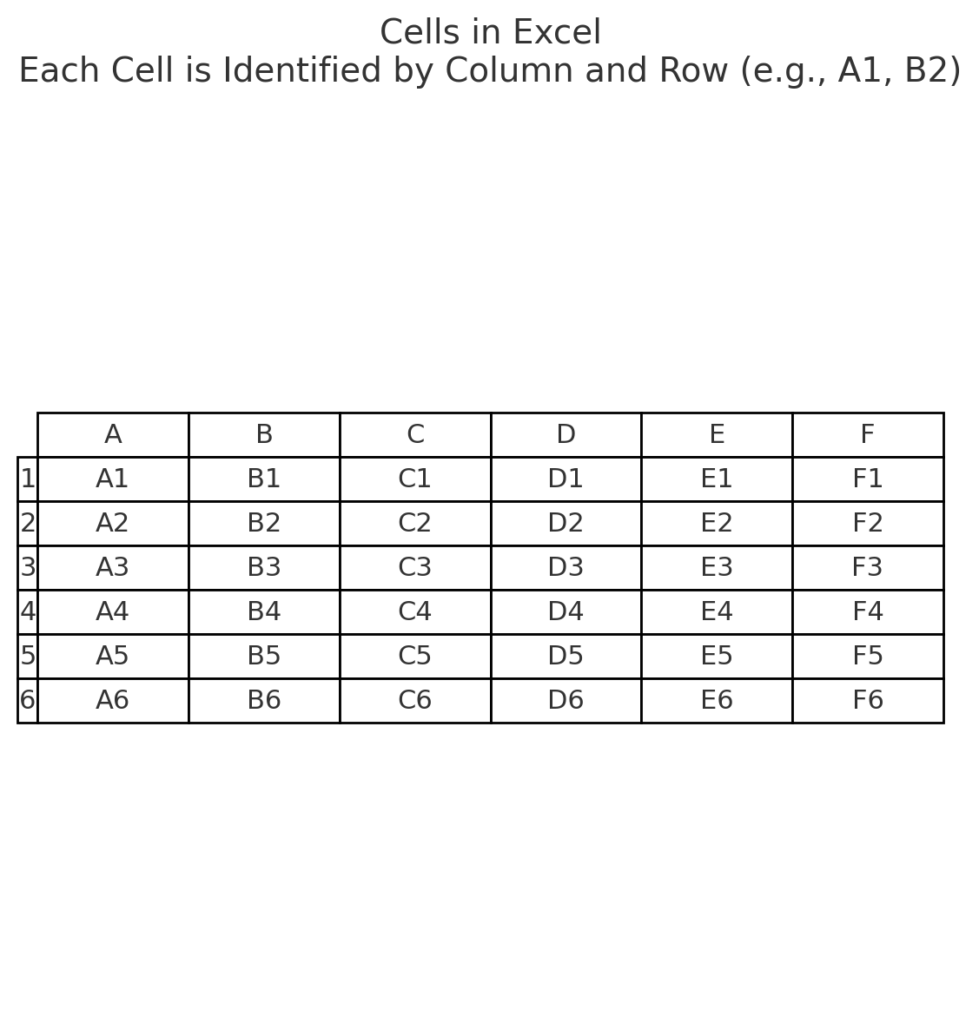
A cell in Excel is the fundamental unit where you store data—whether it’s a number, text, formula, or function. Each cell is identified by its address (like A1, B2, etc.), which is determined by its column letter and row number.
Cells allow you to:
- Enter data (names, prices, formulas)
- Format content (colors, alignment, font styles)
- Create functions and data visualizations
Excel starts with the same row height and column width for all cells. However, these can change and become uneven when you make adjustments. Keeping cells the same size gives a neat look. This is important for documents that you print or share.
How to Make Cells the Same Size in Excel
Here are five easy ways to make rows and columns the same size in Excel. You can do this manually or with built-in tools.
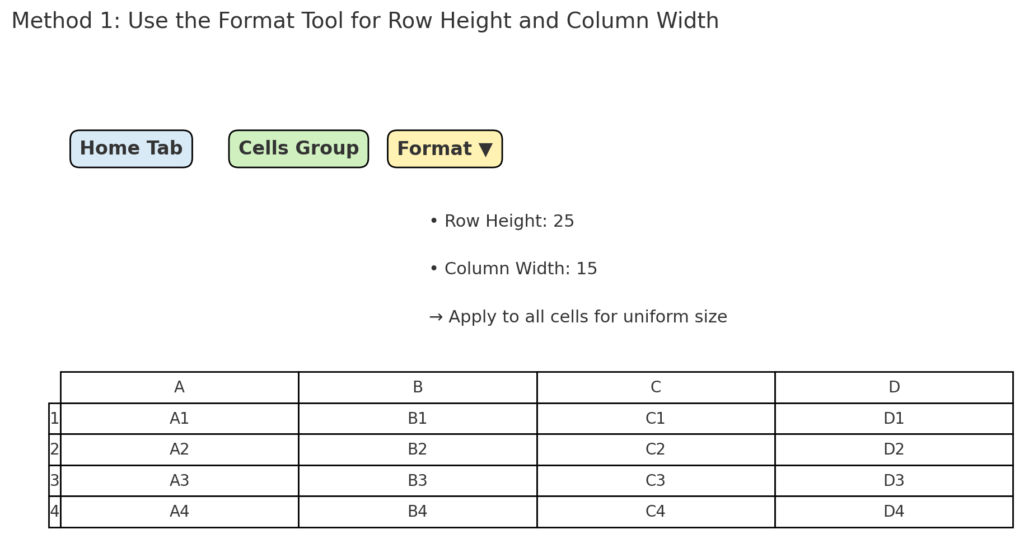
Method 1: Use the Format Tool for Row Height and Column Width
- Select all the cells you want to adjust. You can also press Ctrl + A to select the entire worksheet.
- Go to the “Home” tab.
- Click “Format” under the Cells group.
- Choose:
- Row Height – Set a value (e.g., 25)
- Column Width – Set a value (e.g., 15)
Make all rows and columns use the same number. This will create square or rectangular cells with the same size.
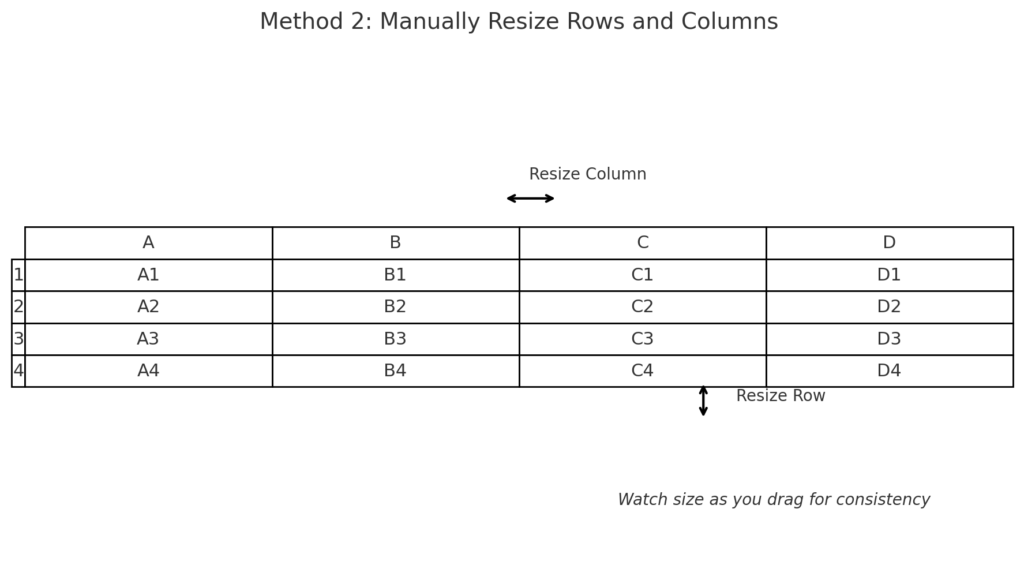
Method 2: Manually Resize Rows and Columns
- Hover your mouse between two row numbers (e.g., between 3 and 4) or column letters (e.g., between B and C).
- When the cursor changes to a double-headed arrow, click and drag to resize.
- Keep each row or column the same size by watching the number that shows up as you drag.
This method is best for small adjustments but not ideal for large datasets.
Method 3: Copy-Paste Formatting (Format Painter)
- Select a cell with the desired size.
- Click Format Painter (found under the Home tab).
- Click and drag over the cells you want to match in size.
Format Painter helps apply formatting like size, alignment, and fonts. However, row height and column width might not always copy correctly.

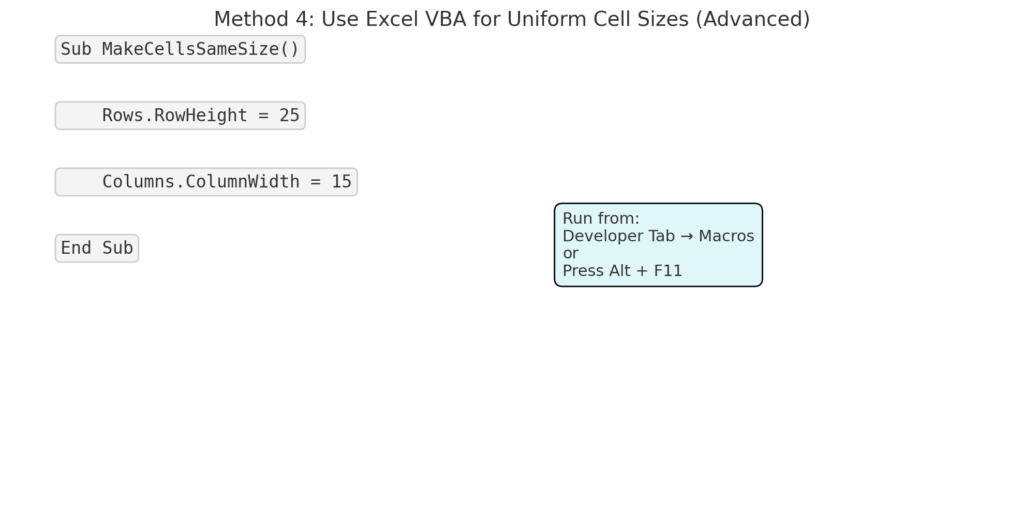
Method 4: Use Excel VBA for Uniform Cell Sizes (Advanced)
If you want to apply the same size to a large number of cells across multiple sheets, using a VBA macro is ideal.
Sub MakeCellsSameSize() Rows.RowHeight = 25 Columns.ColumnWidth = 15 End Sub
Run this macro from the Developer tab or press Alt + F11 to open the VBA editor.
Examples of Making Cells the Same Size
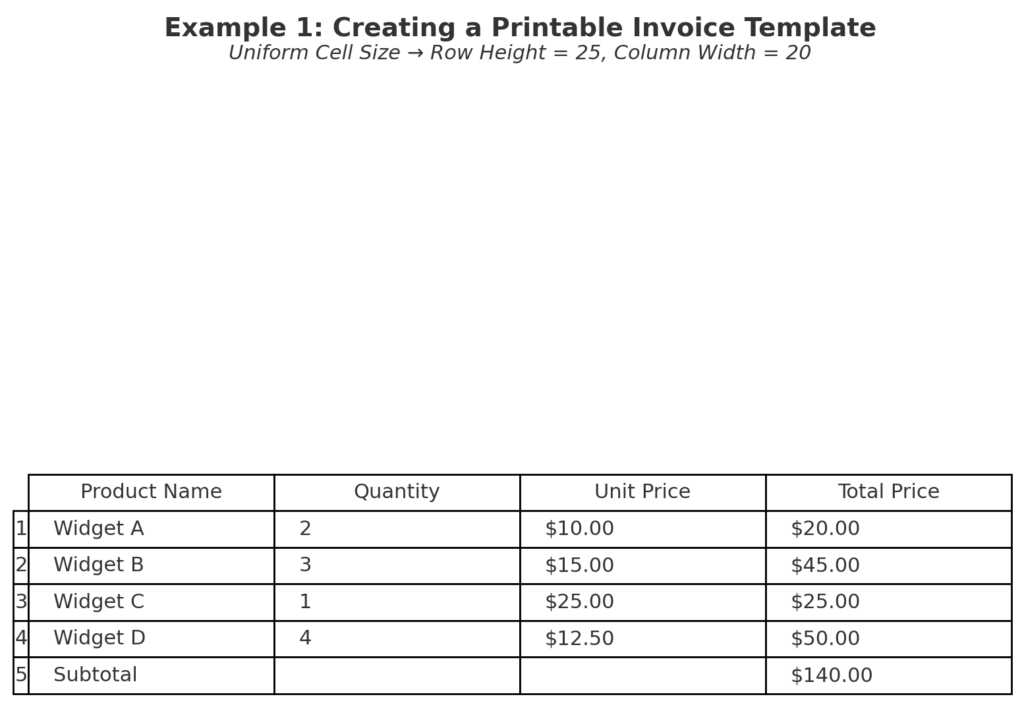
Example 1: Creating a Printable Invoice Template
You want all fields—like product name, quantity, price—to align perfectly. Make each cell the same size (e.g., Row Height = 25, Column Width = 20) for clean formatting and easy printing.
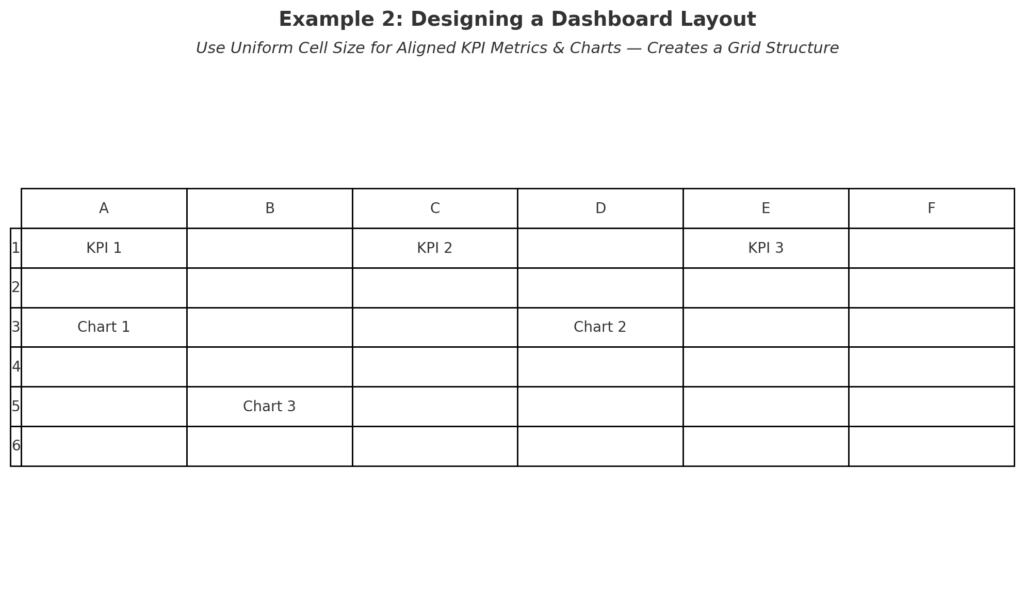
Example 2: Designing a Dashboard Layout
For your charts and KPI metrics to align well in your Excel dashboard, use the same cell sizes. This creates a grid-like structure. It makes placement more predictable and improves visual design.
Benefits of Making Cells the Same Size
Professional and Consistent Layout
Uniform cell sizes create a smooth, consistent look. This is important when entering dynamic data or copying cells from various sources. A neat spreadsheet can impress clients, colleagues, and supervisors in reviews or presentations.
Improved Readability
When cells are the same size, it’s easier for the eyes to track rows and columns. This is very helpful for large datasets or when using Excel on small screens. Example: In a student grade book or pricing sheet, uniform cells help you read better. They also lower the chance of missing lines.
Better Printing and Exporting
Making all cells the same size ensures your sheet prints cleanly and evenly. Excel’s print previews depend on cell size. If the dimensions are uneven, content may get cut off or misaligned. For PDF exports or hard copies, standardized cell sizing offers superior visual structure.
Easier Data Entry
When cells vary in size, users may feel unsure about where to enter or expect data. Uniform cell dimensions remove ambiguity. For shared documents or team-based sheets, this consistency makes collaboration smoother.
Ideal for Grids and Forms
Grids, checklists, Gantt charts, and interactive forms need uniform cell sizes. This ensures they work well and stay aligned. Uniform cell sizes are key for tools like calendars and planners in Excel.
How to Make all Cells the Same Size in Excel
Frequently Asked Questions (FAQ’s)
Can I make all cells perfect squares?
Yes. Use the same value for both row height and column width. Setting the row height to 20 and the column width to 2.14 usually makes a square cell. However, this can change a bit because of Excel’s measurement differences.
How do I reset cells back to default size?
Right-click on a row or column and choose “Row Height” or “Column Width,” then enter:
- 15 for row height
- 8.43 for column width
These are Excel’s default settings.
Does merging cells affect cell size?
Yes. Merging combines multiple cells into one and may disrupt row/column formatting. Avoid merging if you want a grid-style layout with uniform cell sizes.
Why do my changes only affect one cell?
You must select the entire row or column before adjusting the size, not just a single cell. Use Shift or Ctrl to select multiple areas.
Can I apply these steps on Excel Online?
Yes. Most methods listed (except VBA) work well in Excel Online. This includes manual resizing and using the Format tool.
Conclusion
Making cells the same size in Excel might seem small, but it really helps. It improves the professionalism, readability, and functionality of your spreadsheet. A clean layout improves user experience. It also reduces formatting errors. This applies when you create templates, print invoices, or build dashboards. Follow the steps in this guide. Set consistent row heights and column widths. This way, you’ll have full control over your sheet’s structure.