

Managing bulk mailings can take a lot of time. This is true for business promotions, wedding invitations, or shipping. The right tools can make it easier. You can easily create and print professional address labels using Microsoft Excel with the Mail Merge feature in Microsoft Word. This method automates the process. It cuts down on errors and saves time spent writing or copying addresses.
What are Address Labels?
Address labels are sticky labels or printable fields. They show recipient details like name, street address, city, state, and ZIP code. These labels usually come on sheets, like Avery labels. You apply them to envelopes, packages, or products for mailing or delivery.
They are commonly used in:
- Business mailings (newsletters, catalogs, invoices)
- E-commerce packaging
- Wedding and event invitations
- Nonprofit donation campaigns
- Inventory shipping and tracking
To print customized labels fast and accurately, first organize your addresses in Excel. Then, use Word’s Mail Merge to format them.
How to Print Address Labels from Excel
To print address labels from Excel, use Microsoft Word’s Mail Merge tool. It pulls data from your Excel file and places it into a label format. Here is the complete process:
Step 1: Prepare Your Excel File
- Open a new Excel sheet.
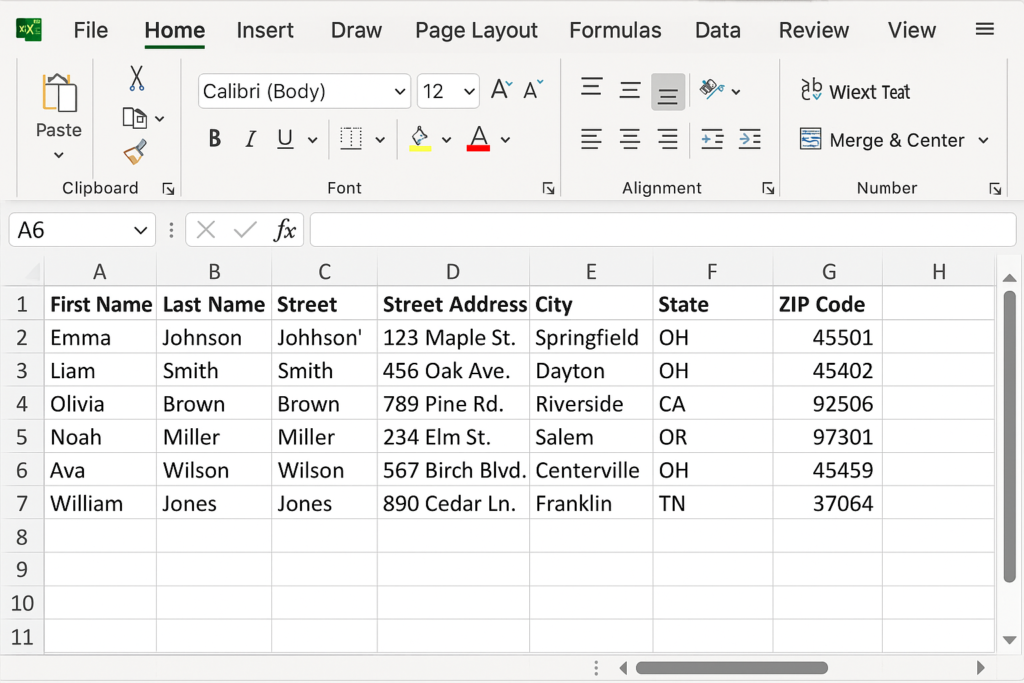
- Create clear column headers, such as:
- First Name
- Last Name
- Street Address
- City
- State
- ZIP Code
- Fill in the address details under each column.
- Save the file with a descriptive name (e.g., Customer_Addresses.xlsx).
Ensure that your sheet has no merged cells or blank columns, as this may interfere with the Mail Merge.
Step 2: Open Microsoft Word and Start Mail Merge
- Open Microsoft Word.
- Go to the Mailings tab in the ribbon.
- Click on Start Mail Merge > Labels.
- In the Label Options dialog:
- Choose your printer type (e.g., continuous-feed or page printers).
- Select the label vendor (e.g., Avery US Letter).
- Choose a label product number (match the label sheet you’re using, e.g., 5160).
- Click OK.
Word will now generate a blank label template grid.

Step 3: Connect Excel Sheet to Word
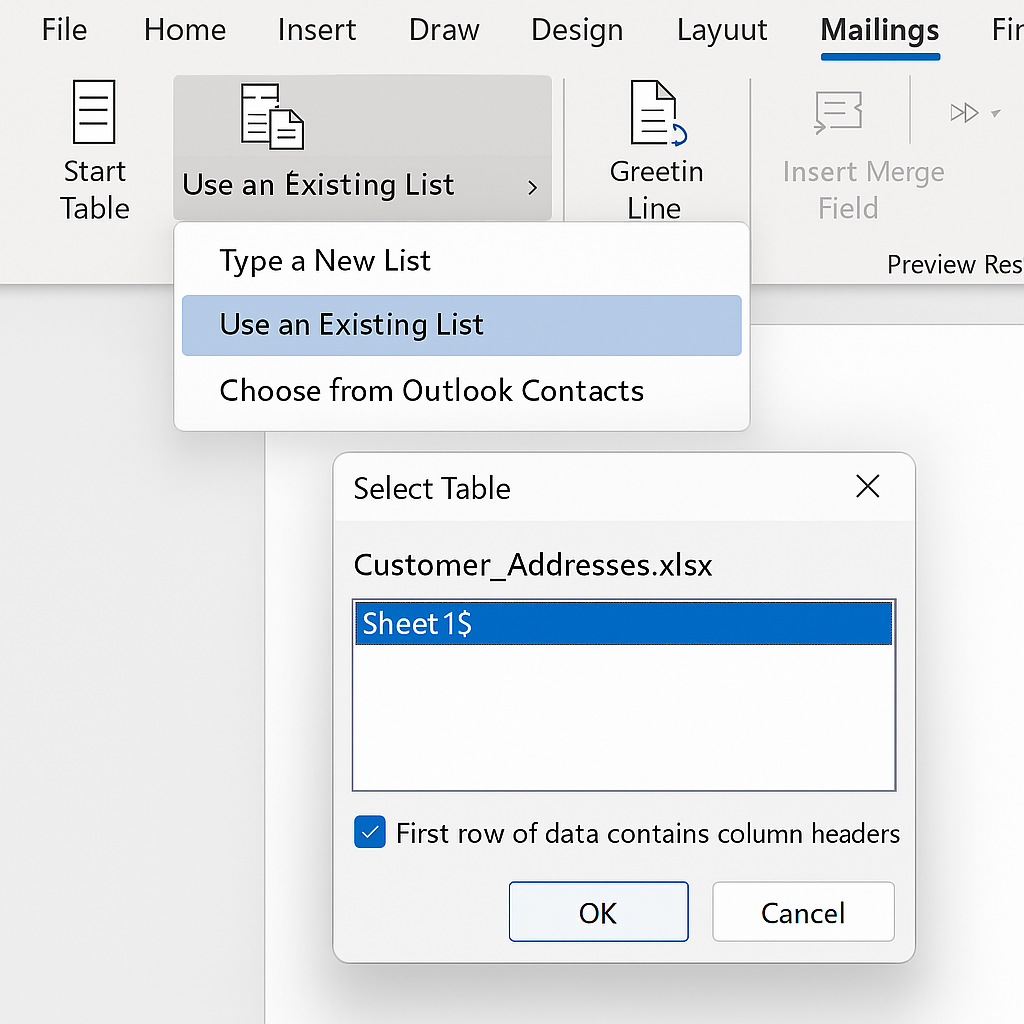
- In Word, go to Select Recipients > Use an Existing List.
- Browse and select your Excel file.
- Choose the correct worksheet containing your address list.
- Click OK.
Your Excel file is now linked to your Word document for data merging.
Step 4: Insert Address Fields
- Click on the first label box in the Word document.
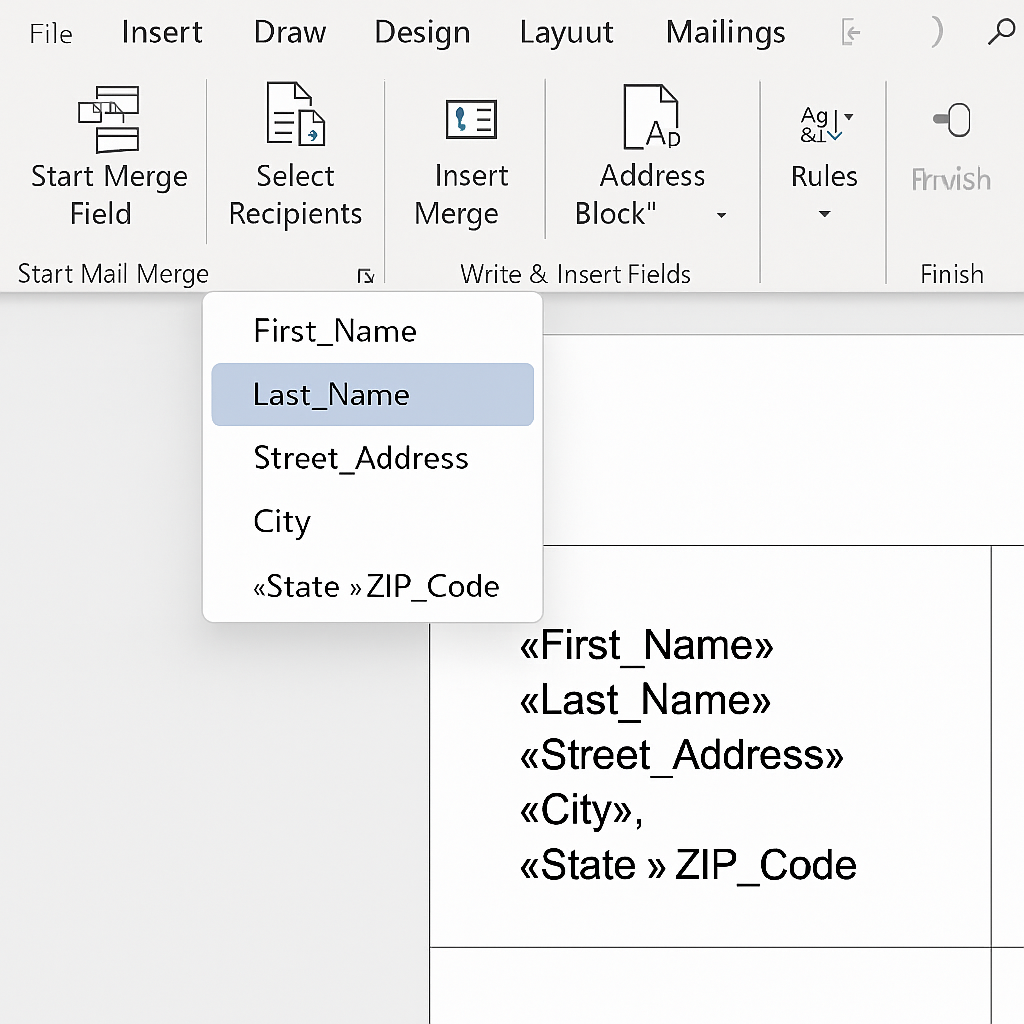
- Select Insert Merge Field, then insert the fields in order:
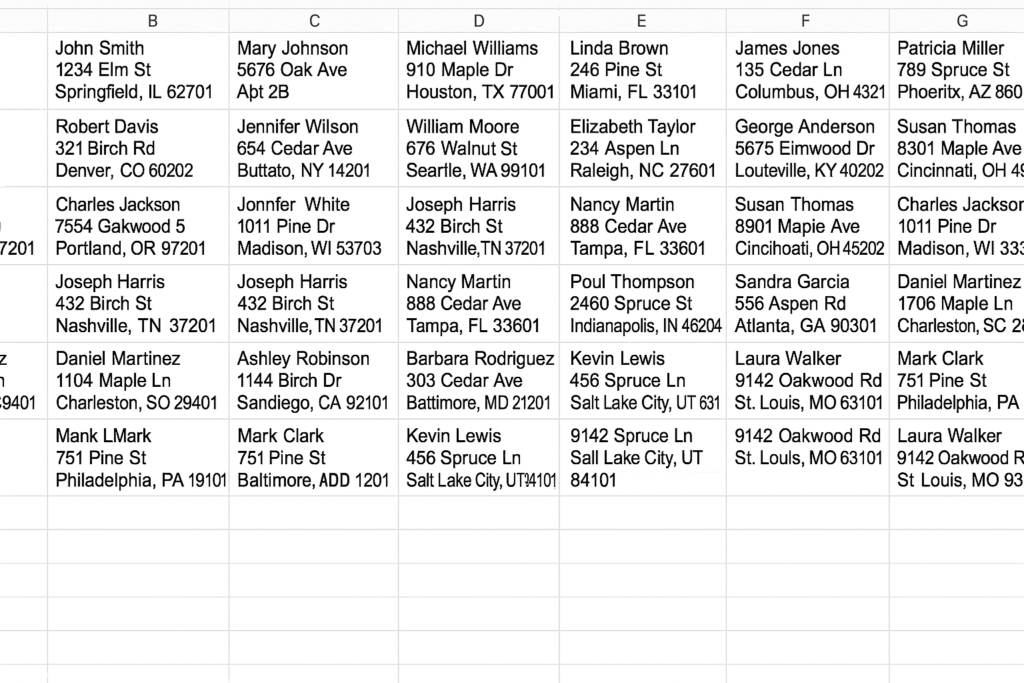
«First_Name» «Last_Name» «Street_Address» «City», «State» «ZIP_Code»
- After inserting fields, click Update Labels to apply the same format to all labels.
- Click Preview Results to view how the data looks.
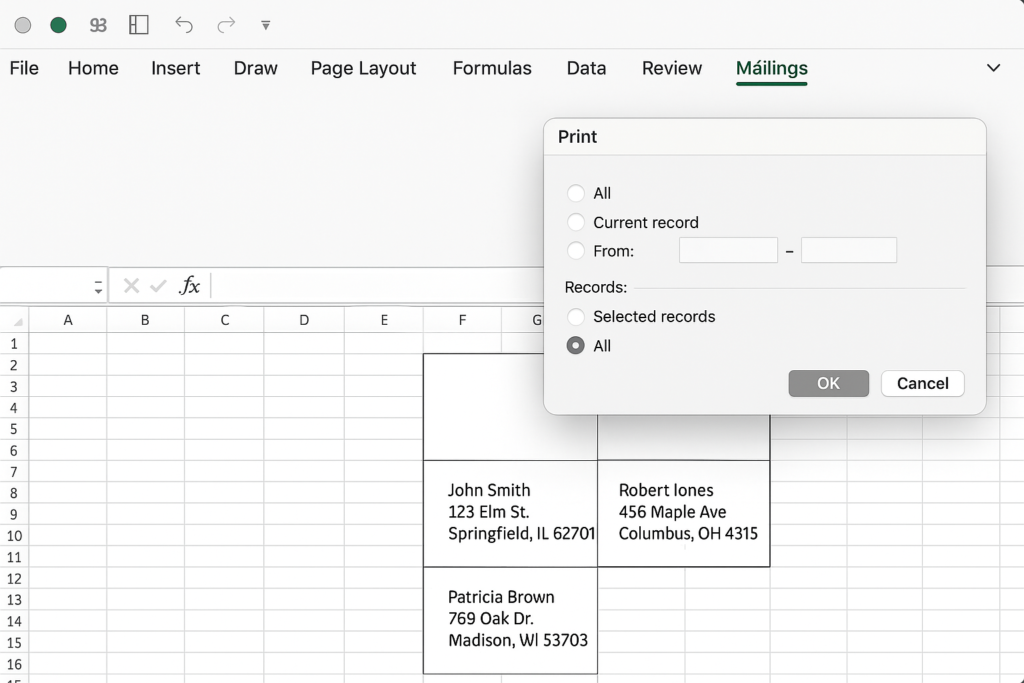
Step 5: Print the Address Labels
- Once satisfied with the layout, go to Finish & Merge > Print Documents.
- Choose whether to print all, a specific range, or selected records.
- Insert the label sheet into your printer.
- Click OK to print.
You now have neatly printed address labels based on your Excel list.
Examples
Example 1: Business Newsletter Mailing
A small business wants to send a monthly newsletter to 300 clients. The marketing team uses Excel to maintain the address database. Connect it to Word’s Mail Merge and choose Avery 5160 labels. This way, you can create ready-to-print address labels for mass mailing in just a few clicks.
Example 2: Wedding Invitations
A couple is preparing wedding invites for 120 guests. Their guest list, including names and addresses, is maintained in Excel. They use Word’s Mail Merge to print stylish address labels. These labels are made on special paper that fits their wedding theme.
Benefits of Printing Address Labels from Excel
Saves Time and Manual Effort
Typing or writing each address by hand can take hours, especially for bulk mailings. Using Excel and Mail Merge makes it easy. You can create dozens or even thousands of labels in just minutes.
Ensures Accuracy and Consistency
Manually transcribing addresses increases the risk of typos or formatting errors. Excel data merges directly into the label layout. This keeps the information exactly as entered. So, you get consistent formatting on all labels.
Customizable Layouts and Fonts
Word lets you format label fonts, spacing, and alignment to match your brand or event design. You can change font styles, add borders, or include logos. This makes the labels useful and good-looking.
Supports Dynamic Data Updates
As your Excel list grows, you don’t have to start over. Just update your Excel sheet. Then, reopen your Word Mail Merge file. Finally, refresh the connection to print new labels right away.
Compatible with Standard Label Sheets
Microsoft Word offers many label templates from brands like Avery and Herma. You can print on pre-cut sheets that work with standard printers. No custom settings are needed.
How to Insert/Embed a PDF in a Microsoft Excel Spreadsheet
FAQ’s
Can I use Excel to format the labels before printing?
No. Excel holds and manages the data. However, you design labels in Microsoft Word with Mail Merge. Excel alone does not support label formatting for printing.
What type of printer should I use for address labels?
A standard inkjet or laser printer works well for most label sheets. For high-volume printing, think about using a dedicated label printer. Choose one that supports continuous feed or thermal labels.
How do I know which label size to choose in Word?
Check the product number on your label sheet (like Avery 5160). Then, choose that exact number under Mailings > Labels > Options in Word. This ensures your print lines up correctly with the label layout.
Will the labels print on both sides of the sheet?
No. Label sheets are typically single-sided. Excel and Word Mail Merge are designed to print on the front side only. If you’re using a double-sided template, check the printer’s duplex settings. This is rare, but it’s good to ensure everything is set correctly.
Conclusion
Knowing how to print address labels from Excel is key for people. You can quickly make customized, error-free labels in Excel and Microsoft Word. Just follow a few simple steps. This saves time and boosts your professionalism. This method provides great flexibility and efficiency. It works for newsletters, promotions, event invites, and product shipping. Microsoft Office tools are always improving. You can make your mailing processes easier by combining Excel’s data management. This keeps everything current with the best digital practices.