

Excel is a powerful tool for organizing and analyzing data. However, poor data structure can make it hard to interpret or manipulate information. Many users often struggle with transposing columns to rows. This means changing data from a vertical layout to a horizontal one, or the other way around. Transposing data in Excel improves clarity, flexibility, and presentation. This tool is useful for formatting survey results, adjusting datasets for reports, and aligning data for system imports. This guide shows you how to transpose columns to rows. It includes step-by-step methods, practical examples, and detailed benefits. You’ll also find answers to common questions.
What is Transpose Columns to Rows?
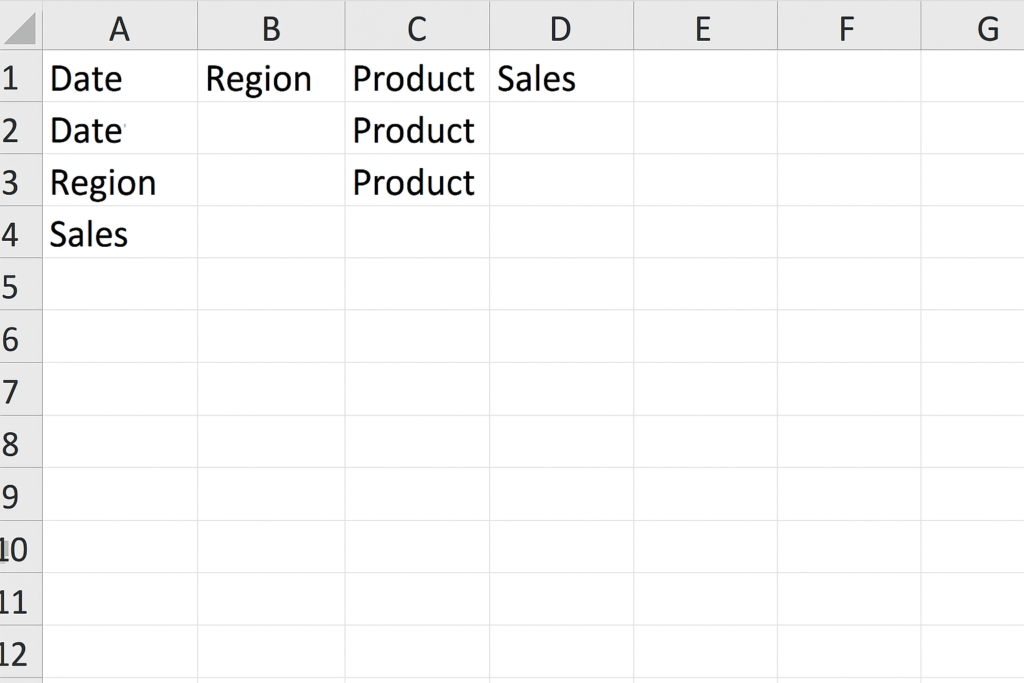
In Excel, transposing changes data from columns to rows or from rows to columns. To transpose your data, switch it from vertical columns (A, B, C, etc.) to horizontal rows (1, 2, 3, etc.).
For example:
Before Transposing:
| A | B | C |
| Name | Age | City |
| John | 30 | London |
After Transposing:
| A | B |
| Name | John |
| Age | 30 |
| City | London |
Transposing is helpful when you need to change your dataset. It helps with formatting for charts, reports, import tools, or analysis.
How to Transpose Columns to Rows in Excel
Excel lets you transpose data in different ways. You can choose a static transformation or a dynamic one that updates with your source data.
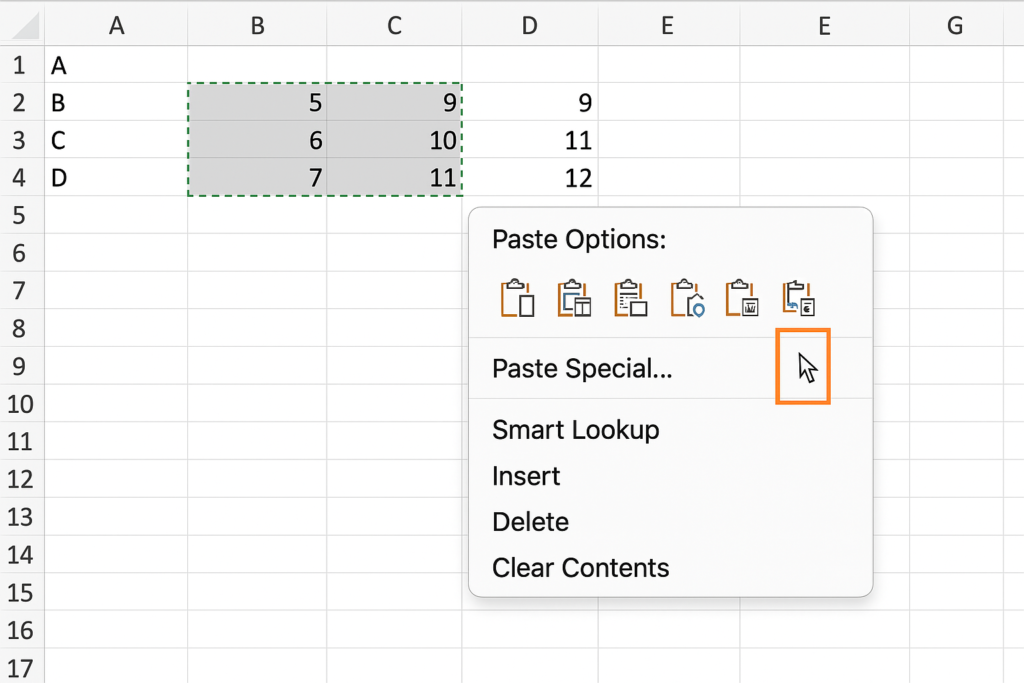
Method 1: Paste Special – Transpose (Static)
This is the most straightforward method and perfect for one-time transformations.
Steps:
- Select the range of cells in columns that you want to transpose.
- Press Ctrl + C (or right-click > Copy).
- Right-click on the destination cell where you want the data in row format.
- Choose Paste Special > Transpose (check the Transpose box).
- Click OK.
The data will now be pasted horizontally. However, it’s a static copy, meaning it will not change if the original data is updated.
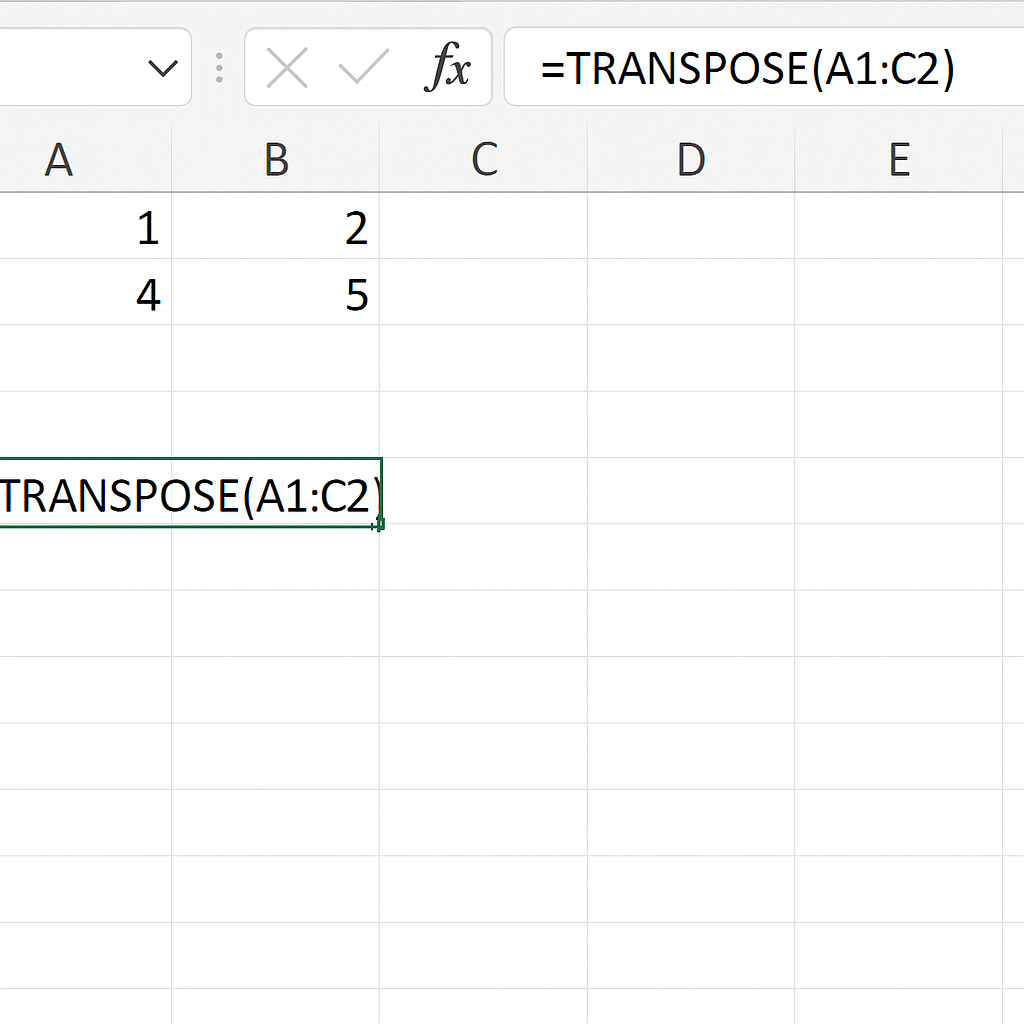
Method 2: Use the TRANSPOSE Function (Dynamic)
The TRANSPOSE function lets you link transposed data to the original set.
Steps:
- Select a blank area that has the opposite orientation of your source. This means rows should change to columns.
- Type the formula:
=TRANSPOSE(A1:C2)
- Press Ctrl + Shift + Enter in older Excel versions. In newer versions like Excel 365 or Excel 2019+, just press Enter.
The data links dynamically. So, when the source data changes, the transposed data updates automatically.
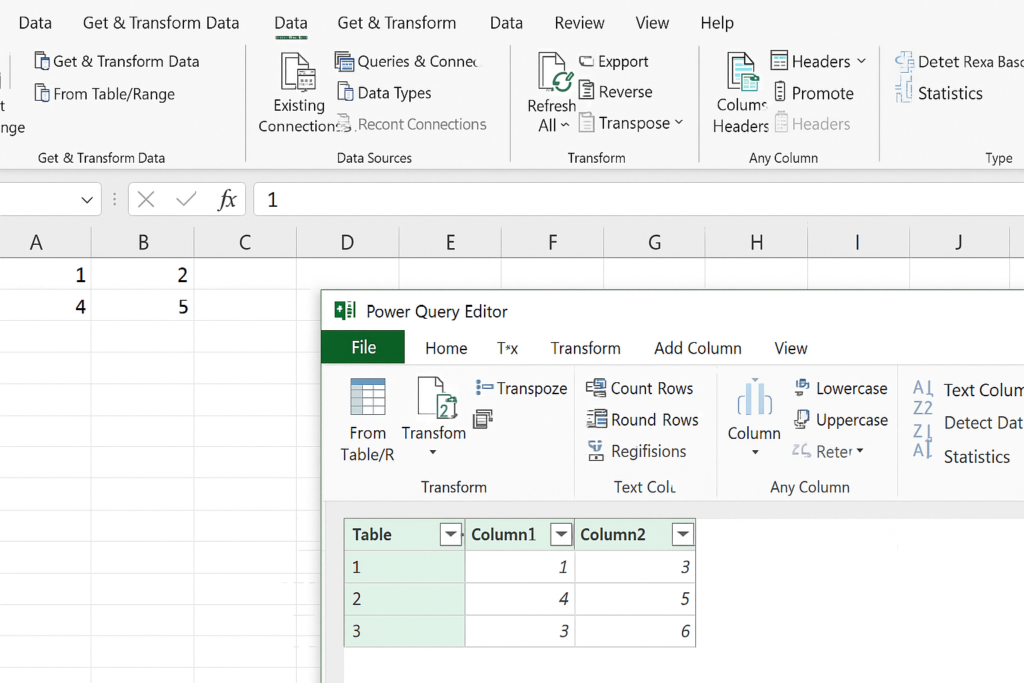
Method 3: Use Power Query (Advanced Users)
Power Query is ideal for working with large datasets or transforming data regularly.
Steps:
- Select your data and go to Data > Get & Transform > From Table/Range.
- In Power Query Editor, go to Transform > Transpose.
- If needed, use Use First Row as Headers or Promote Headers.
- Click Close & Load to bring the transposed data back into Excel.
Power Query is flexible and allows repeatable transformations with just a few clicks.
Method 4: Use VBA for Automated Transposing
For repetitive tasks or large-scale operations, a macro can automate the transpose.
Sub TransposeData()
Range(“A1:C3”).Copy
Range(“E1”).PasteSpecial Paste:=xlPasteAll, Transpose:=True
End Sub
To run this:
- Press Alt + F11 to open the VBA editor.
- Insert a new module and paste the code.
- Run the macro to transpose the specified range.
Examples
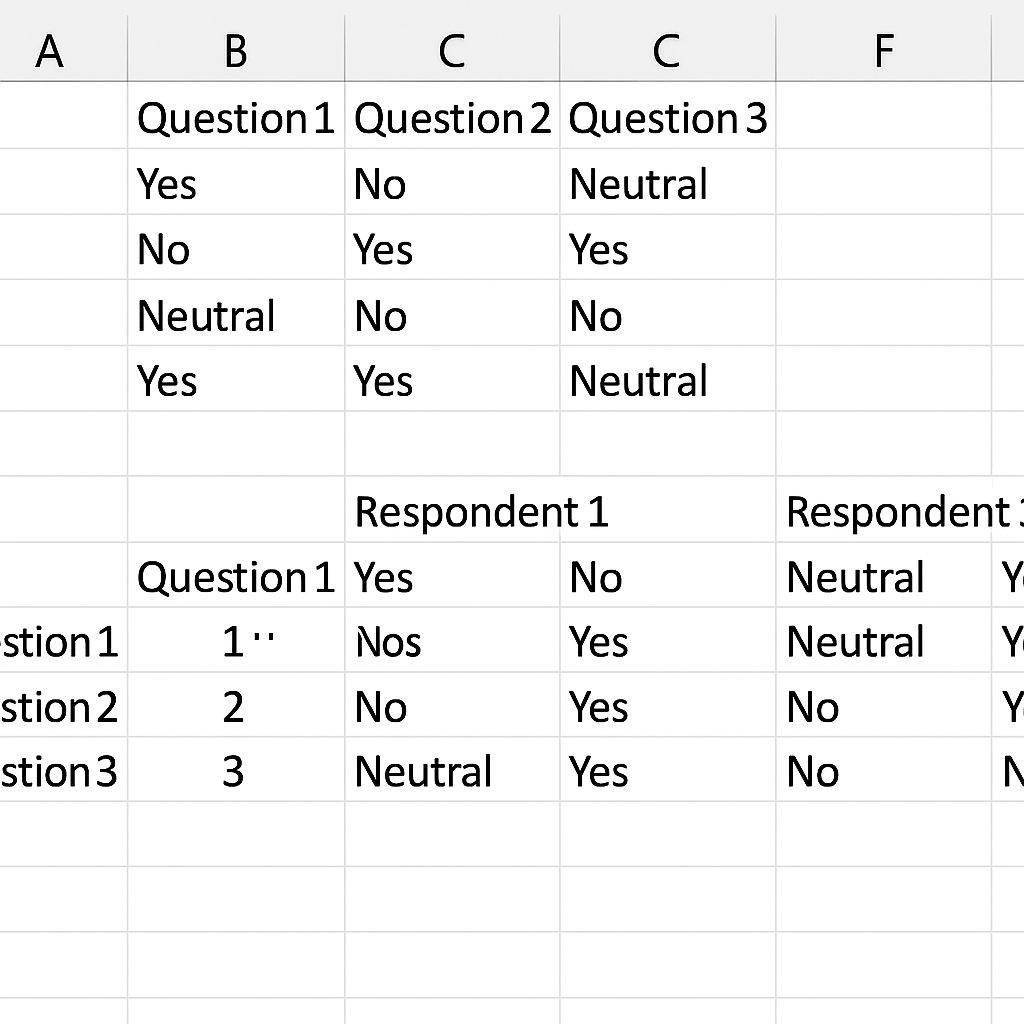
Example 1: Reformatting Survey Data
You receive survey results where each question is in a column and each row is a different respondent. But your report template requires one respondent per column and questions in rows. Transposing the data fixes this without manual rearranging.
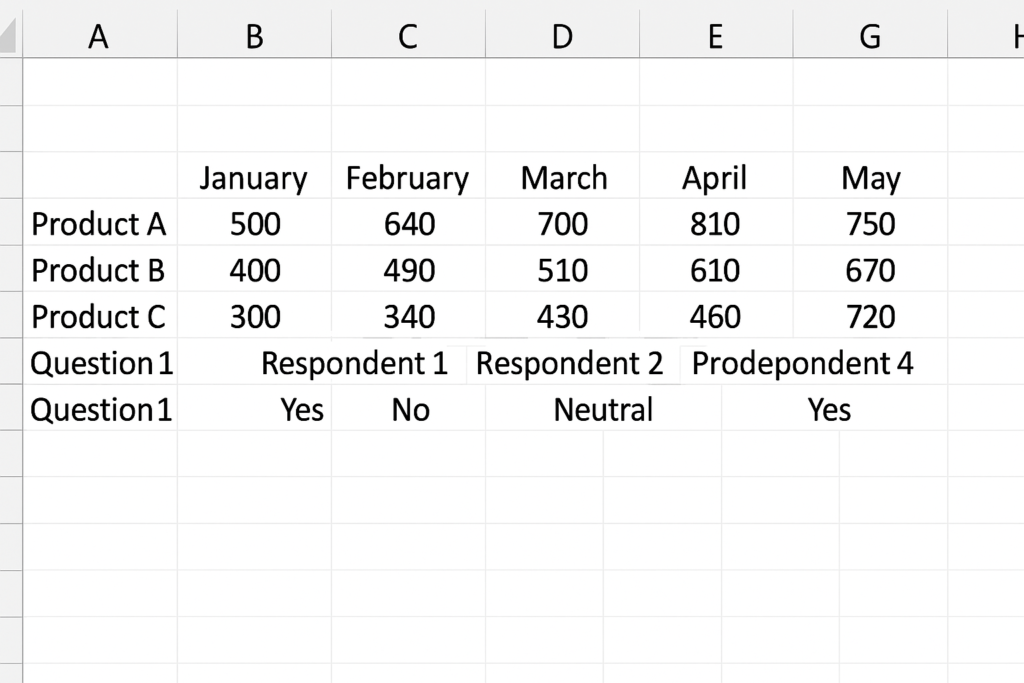
Example 2: Switching Monthly Sales Data
To improve charting, arrange sales data by product in rows instead of columns. This change will show each product’s sales across months more clearly. Transposing turns the column-based data into a horizontal row-based view.
Benefits of Transposing Columns to Rows in Excel
Improves Data Presentation
Sometimes data looks cluttered or is hard to interpret when displayed vertically. Transposing lets you flip the layout. This often makes reports, dashboards, and charts easier to read. They also better match expectations.
Enables Better Chart Compatibility
Certain Excel charts work more effectively with row-based data. Transposing columns to rows opens up more chart options. You can create clustered column charts, line charts, and combo charts that use data series in rows.
Reduces Manual Formatting Work
Use the transpose tools to quickly reformat your whole dataset. This saves you from copying and pasting individual cells. This minimizes human error and saves time.
Facilitates Data Import and Integration
Many third-party tools and data import systems expect data in a specific format. Transposing helps you change your Excel file’s structure. This makes it fit required schemas and work with databases, CRMs, ERPs, and other software.
Supports Advanced Data Transformations
You can shape data in advanced ways by using transposing with formulas, pivot tables, or Power Query. This allows for deeper analysis, improved automation, and greater efficiency with large datasets.
Transposing Columns into Rows in Excel
FAQ’s
Can I transpose multiple rows and columns with formulas?
Yes. Use the TRANSPOSE() function over a range, such as:
=TRANSPOSE(A1:D5)
Make sure to select a range of the correct size before pressing Enter.
Does transposing affect original data?
No. Transposing creates a new layout in a different location. Your original data remains unchanged unless you overwrite it manually.
How do I avoid static values when transposing?
Use the TRANSPOSE() formula or Power Query. Both create a dynamic link with the source data, so changes update automatically.
Why is my transpose formula not working?
Make sure:
- You selected a large enough output range.
- You pressed Ctrl + Shift + Enter in older Excel versions.
- The referenced cells don’t contain merged cells or incompatible data types.
Conclusion
Transposing columns to rows in Excel is a crucial skill for professionals, analysts, students, and business users. Transposing helps with data usability and presentation. It’s useful when you prepare reports, clean data, or format information for import. Excel offers many ways to change your data layout. You can use simple copy-paste options, dynamic formulas, or advanced tools like Power Query. Choose the one that fits your scenario—whether for one-time edits or ongoing updates.