

When working with Excel, presentation matters just as much as data accuracy. Adding headers makes your document look polished and professional. Headers improve readability for sales reports, student grade sheets, and financial summaries. A good header shows the document’s title, date, author, and other important context. It should appear on every printed page. This guide covers what a header is and how to add them to Excel sheets. It provides step-by-step instructions, real-life examples, and the benefits of using headers. It answers common questions. This makes it great for beginners and advanced users.
What Is a Header?
A header in Excel is the content that shows at the top of each printed page, not the first row of your spreadsheet. This should not be confused with “column headers” like A, B, C or row headers like 1, 2, 3.
The header is used for:
- Document titles
- Company names or logos
- Date and time
- Page numbers
- Confidentiality notices
It appears only during printing or in Page Layout view or Print Preview mode. It doesn’t change the rows or cells. Instead, it adds information above the worksheet content.

How Do I Add a Header to Excel?
Adding a header to an Excel file is easy using the built-in Header & Footer tools. Here’s how you can do it step by step:
Method 1: Add Header via Page Layout View
- Open Your Excel Workbook: Open the file where you want to add a header.
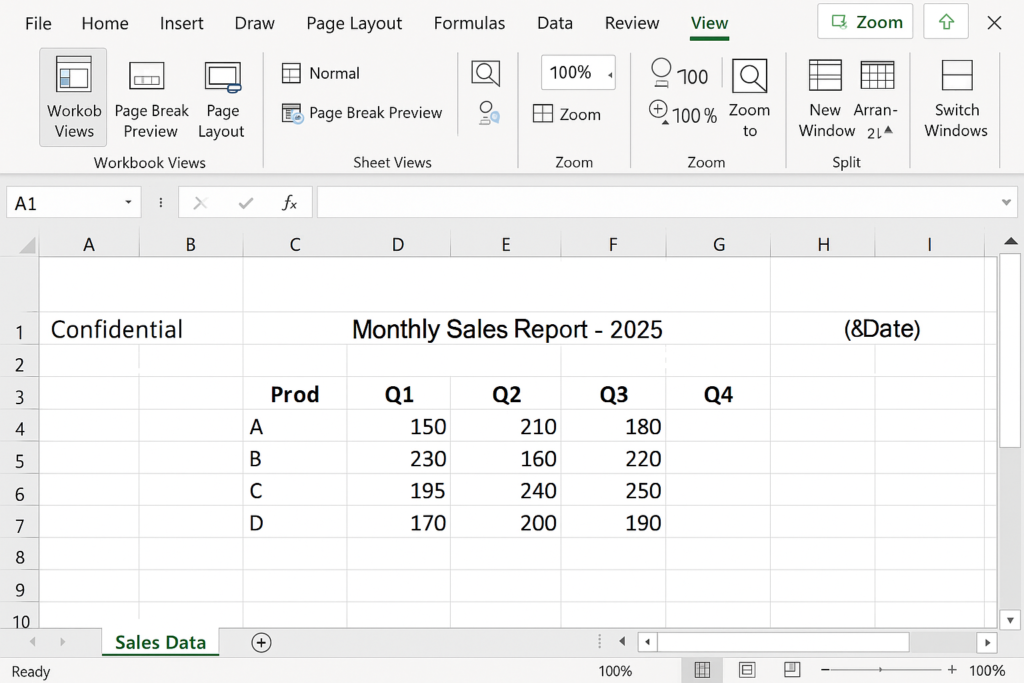
- Switch to Page Layout View: Go to the View tab and select Page Layout from the Workbook Views group. This view lets you see how your sheet will appear when printed.
- Click at the Top of the Page: You’ll see three boxes labeled “Add header”—left, center, and right.
- Enter Your Header Content: Click in any of the boxes and type your text, such as:
- Center: “Monthly Sales Report – 2025”
- Right: “&[Date]” (dynamic date)
- Left: “Confidential”
- Apply Formatting (Optional): Highlight the text to format it using the Home tab—font style, bold, size, etc.
- Click Anywhere: Outside Click on the worksheet area to exit the header section.
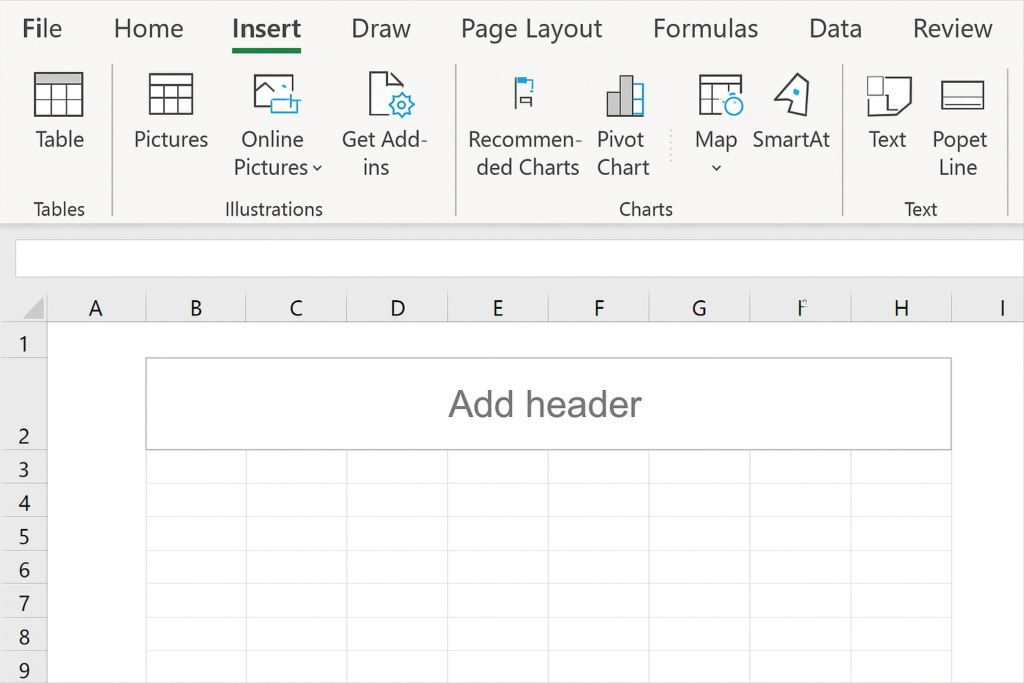
Method 2: Add Header via Insert Tab
- Go to the Insert tab.
- Click Text > Header & Footer.
- Excel will switch to Page Layout View and activate the header section.
- Enter the desired text or use built-in elements like:
- &[Page] – Page number
- &[File] – File name
- &[Sheet] – Sheet name
- &[Time] – Current time
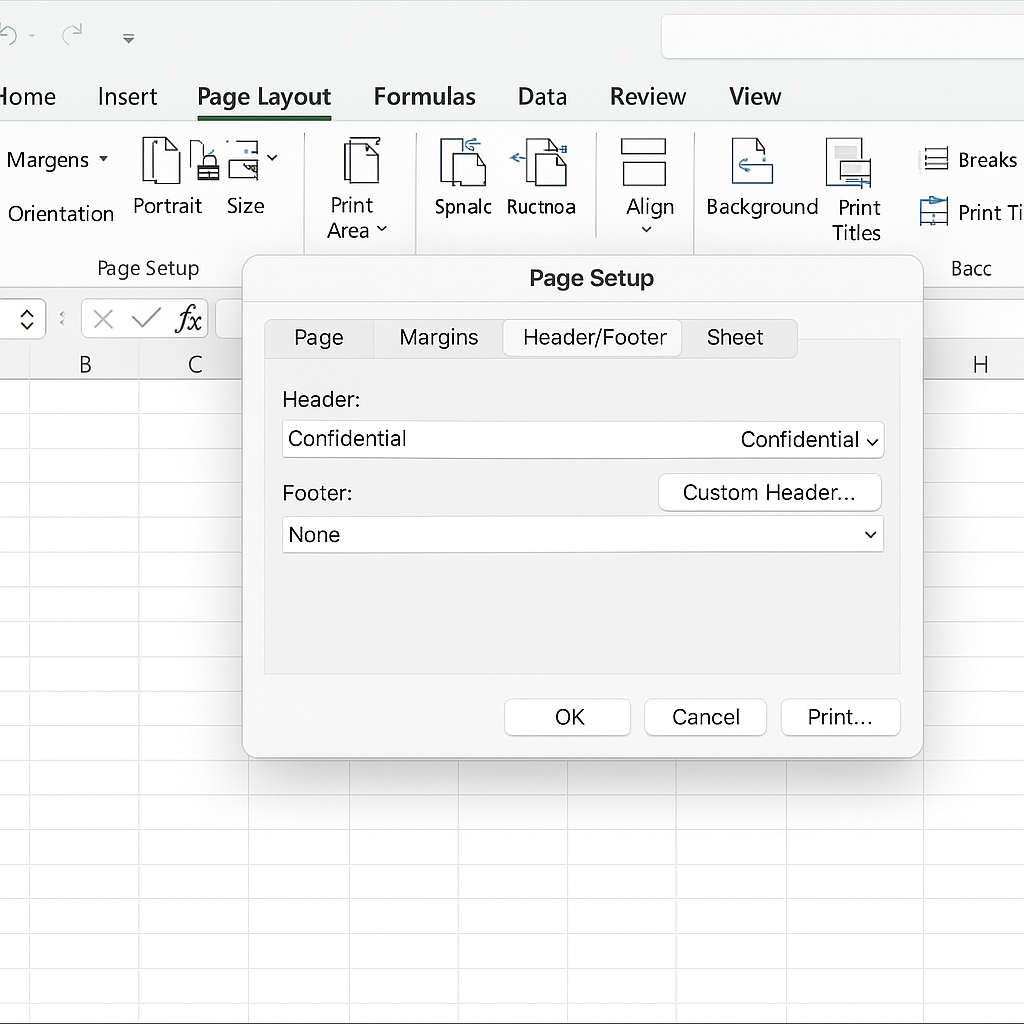
Method 3: Add Header Using Page Setup
- Go to the Page Layout tab.
- Click the small launcher icon at the bottom right of the Page Setup group.
- In the Page Setup dialog box, go to the Header/Footer tab.
- Use the drop-down to select a Built-in header or click Custom Header to create your own.
- Choose left, center, and right section text, then click OK.
This method is especially helpful when printing multiple sheets with the same header.
Examples of Headers in Excel
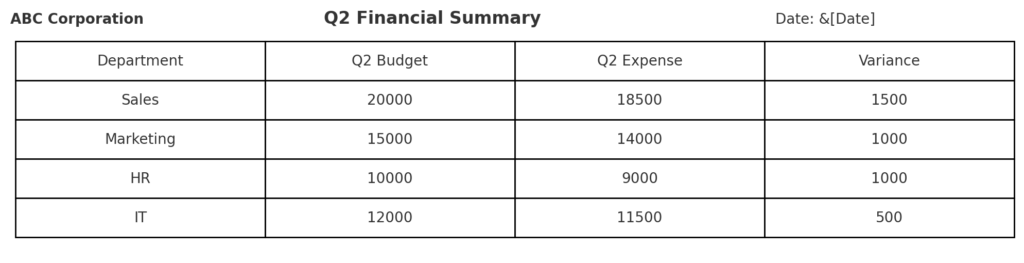
Example 1: Company Report Header
- Left: “ABC Corporation”
- Center: “Q2 Financial Summary”
- Right: “&[Date]”
This keeps your report professional and consistent across all printed pages.
Example 2: School Assignment Submission
- Center: “Student Grades – Spring Semester”
- Right: “Page &[Page] of &[Pages]”
Perfect for multi-page printouts shared with teachers or academic boards.

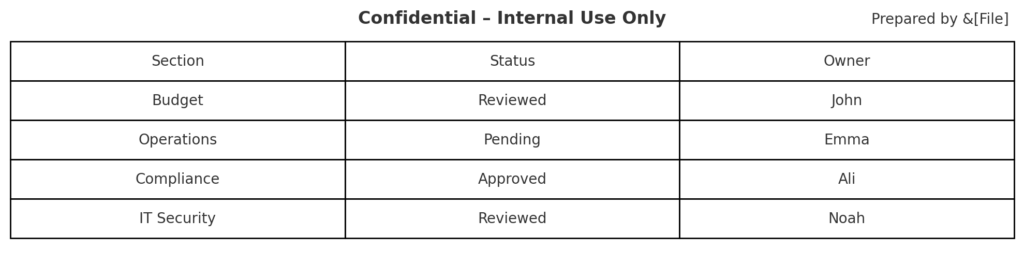
Example 3: Confidential Document
- Center: “Confidential – Internal Use Only”
- Right: “Prepared by &[File]”
Helps in compliance and internal auditing.
Benefits of Adding a Header to Excel
Enhances Document Professionalism
Headers give your spreadsheets a polished, official look—especially when printed or shared. Putting your company name, report title, or branding shows you care about details and professionalism. This is particularly valuable in business settings where first impressions matter.
Improves Clarity in Multi-Page Documents
Printing large worksheets may cause you to miss key details like the report name or page number. Headers keep each page consistent. This helps recipients quickly know what they are reviewing. A centered header, like “XYZ Corp Q1 Earnings,” helps organize a 10-page financial audit report.
Supports Better Record-Keeping and Tracking
Including timestamps or file names in headers helps track documents and manage versions. You can automatically add current date (&[Date]) and time (&[Time]) so each printout has an audit trail. This is especially useful in industries like finance, compliance, and education.
Adds Dynamic, Auto-Updating Content
Using codes like &[Page], &[Date], and &[File] lets the header update on its own. You won’t need to make manual changes every time you print or update the file. This reduces error, saves time, and ensures consistency across documents.
Reinforces Branding
Put your company name or slogan in the header. This way, every printed spreadsheet shows your brand identity. This is valuable in client presentations, board meetings, and internal reports. Some groups add logos in headers. They do this using the Insert Picture option. This gives a more professional look.
Create Custom Headers and Footers in Excel
FAQ’s
Can I remove a header from Excel?
Yes. Go to Page Layout View, click the header area, and delete the content. Or use Page Layout > Page Setup > Header/Footer and choose None.
Does the header print automatically?
Yes, once added, the header will appear on every printed page unless removed manually. Use File > Print Preview to see how it looks before printing.
Can I insert images or logos in the header?
Yes. In Page Layout View, click the header box. Then, go to Header & Footer Tools > Design. Click Picture to add a logo or image.
Can I apply different headers to different sheets?
Yes. Headers are worksheet-specific. You can add unique headers to each sheet by selecting the sheet first and then applying a new header.
Conclusion
Adding a header in Excel is easy and boosts your spreadsheets. It improves readability, makes them look professional, and adds useful features. Headers keep your reports, academic data, and client presentations consistent. They provide clear context on every page.