

Microsoft Excel helps manage and analyze data well. However, small details like column width can cause big usability problems. You might find your data cut off or unreadable because the columns are too narrow. Expanding all columns is a simple fix, but many users aren’t aware of how to do it effectively. If you work with financial reports, sales spreadsheets, or inventory data, expanding all columns in Excel helps. It makes your documents easier to read, more organized, and looks professional. This guide covers all you need to know. It explains what it means to “expand columns.” You’ll learn different techniques, see examples, and find out the benefits. We also include frequently asked questions.
What Does “Expand Columns” Mean in Excel?
Expanding a column in Excel means making it wider. This lets the cell show all its contents without cutting off text or numbers. Excel cells are in rows and columns. Often, the default width is too narrow for long text or big numbers. When that happens, the content either spills into the next cell or shows as hash symbols (###). Expanding the column fixes this issue. It adjusts the width to fit the longest item in each column. This makes it easier to read, cuts down on scrolling, and improves your worksheet’s look.

How to Expand All Columns in Excel
You can expand all columns in Excel in different ways. It depends on your version: desktop, web, or mobile, and what you need. Below are the most effective methods:
Double-click Between Column Headers (AutoFit Method)
This is the most straightforward way to expand columns:
- Select all columns by clicking the triangle at the top-left corner of the sheet (between column A and row 1).
- Move your mouse between any two column headers (e.g., A and B) until the cursor turns into a double-sided arrow.
- Double-click. Excel will automatically resize all selected columns to fit their content.
This method works well for quick fixes. Use it when your data is entered, and you want everything visible.

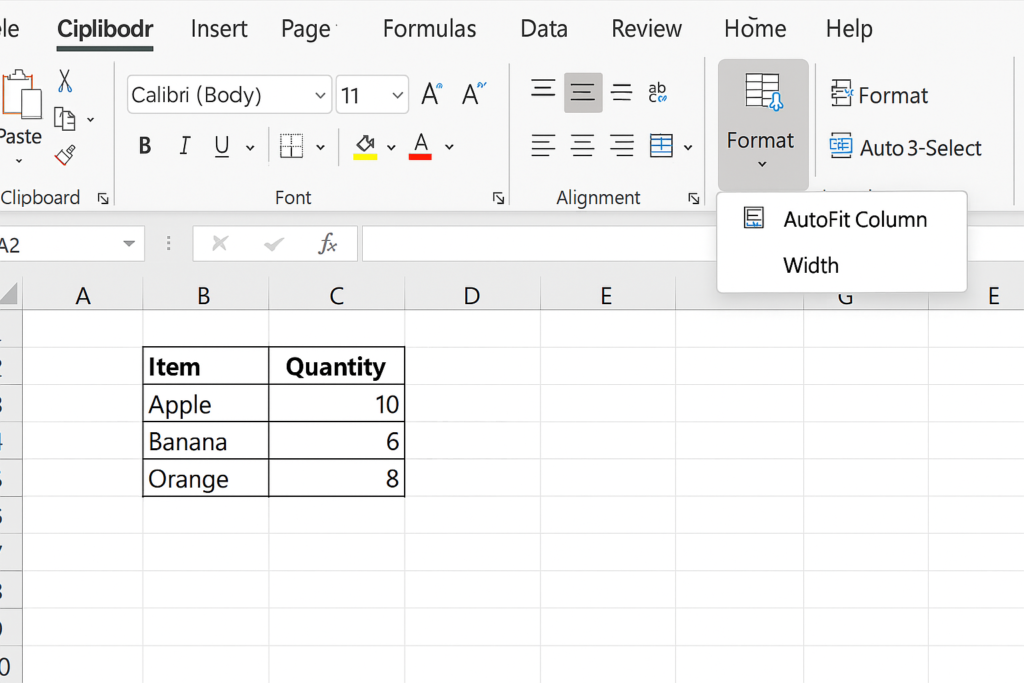
Use the “Format” Option in the Ribbon
- Select the entire worksheet or the range of columns you want to expand.
- Go to the Home tab.
- In the Cells group, click on Format.
- Choose AutoFit Column Width.
This method offers better control. It’s useful, especially with Excel’s ribbon interface.
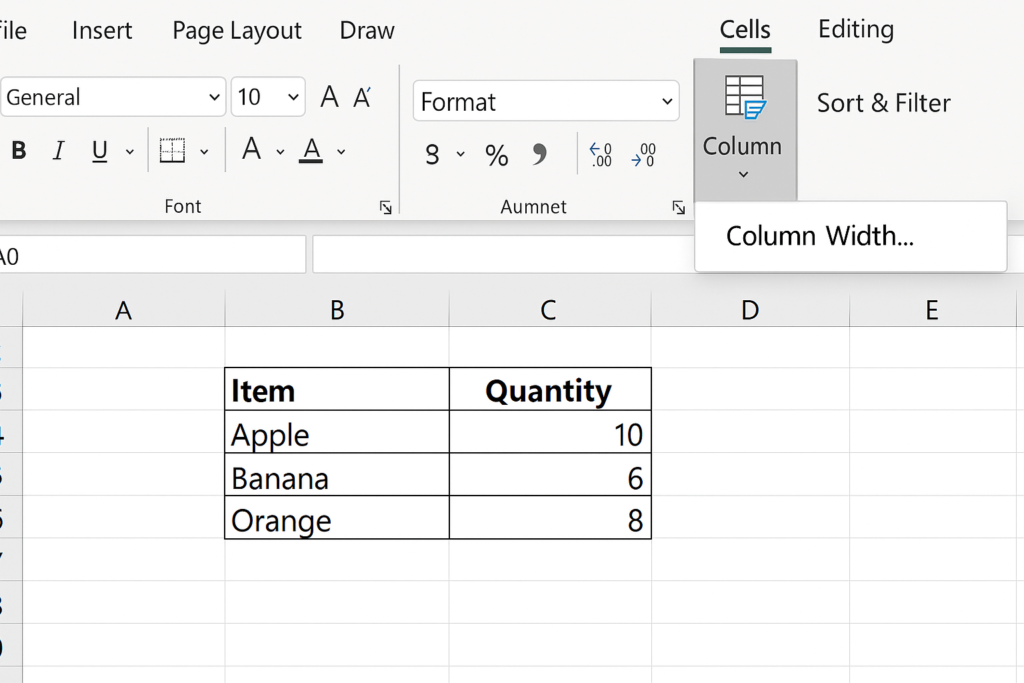
Manually Set a Fixed Width for All Columns
Sometimes you want all columns to have the same specific width:
- Select the desired columns or the entire sheet.
- Go to Home > Format > Column Width.
- Enter a numerical value (e.g., 20) and press OK.
This works best when you want equal column sizes in your spreadsheet. This is great for design or printing.
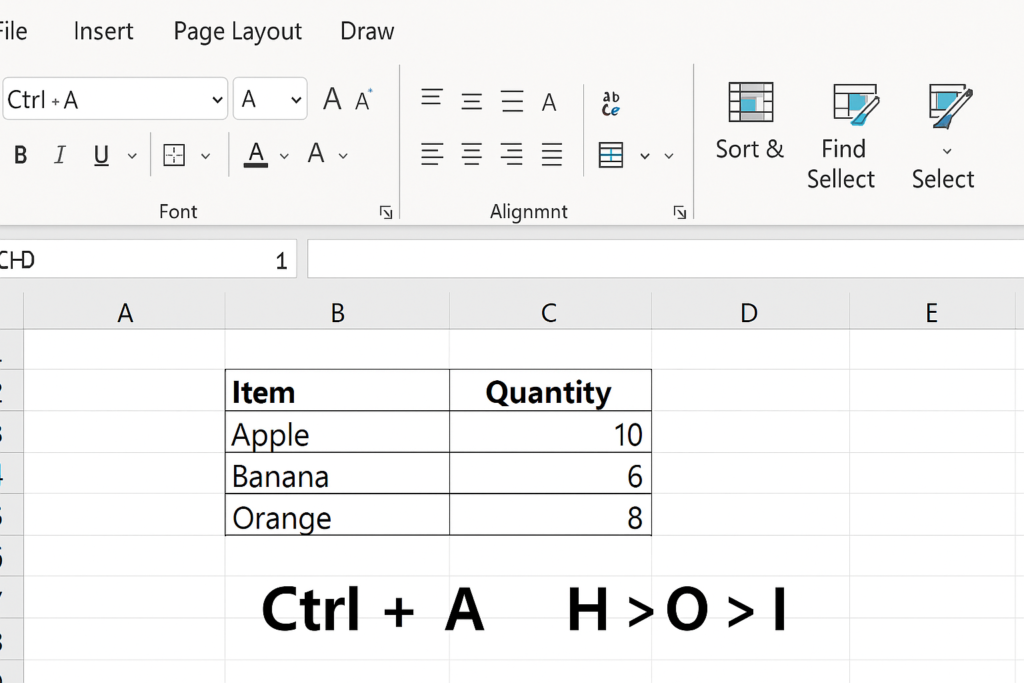
Keyboard Shortcut Method
For power users who prefer keyboard shortcuts:
- Press Ctrl + A to select the entire worksheet.
- Then press Alt > H > O > I in sequence.
- This triggers AutoFit Column Width for all columns.
It’s a fast, keyboard-only way to expand all columns without using the mouse.
Using VBA to Expand All Columns
For those working with large data or repetitive tasks, a macro can automate this:
Sub AutoFitAllColumns()
Cells.EntireColumn.AutoFit
End Sub
Just open the VBA editor (Alt + F11), insert a module, and paste the above code. Run the macro to instantly expand all columns on the active sheet.
Examples of Expanding Columns in Real Scenarios
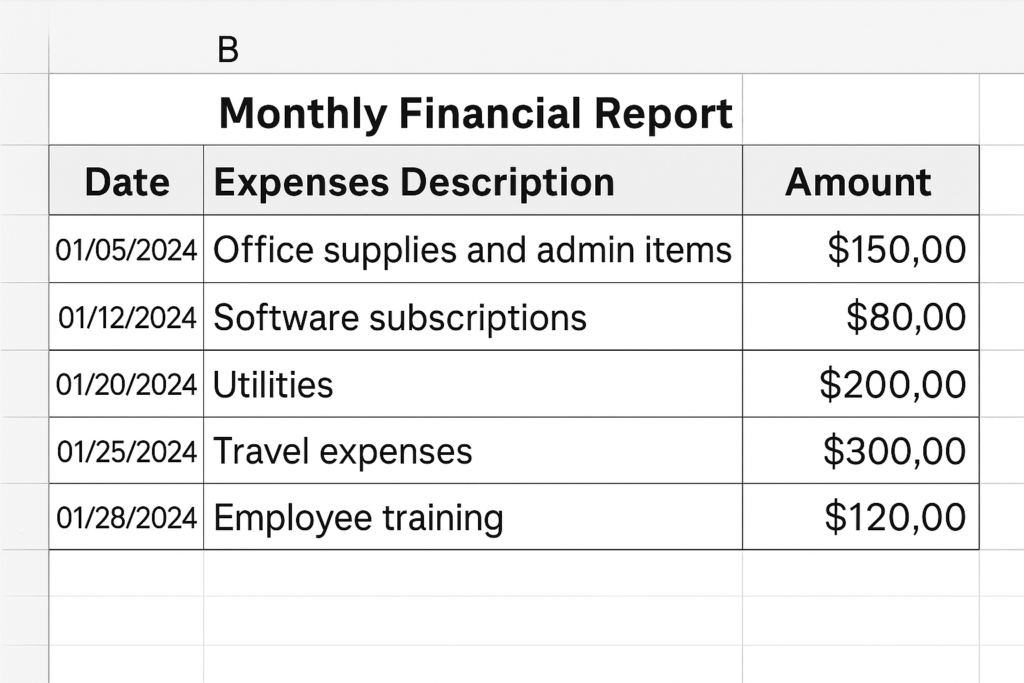
Example 1: Financial Report
Imagine you’re making a monthly financial report. Your “Expenses Description” column has long phrases, like “Office supplies and admin items.” If you don’t expand the column, the full text won’t show. This makes the report hard to read. AutoFit solves this in one click.
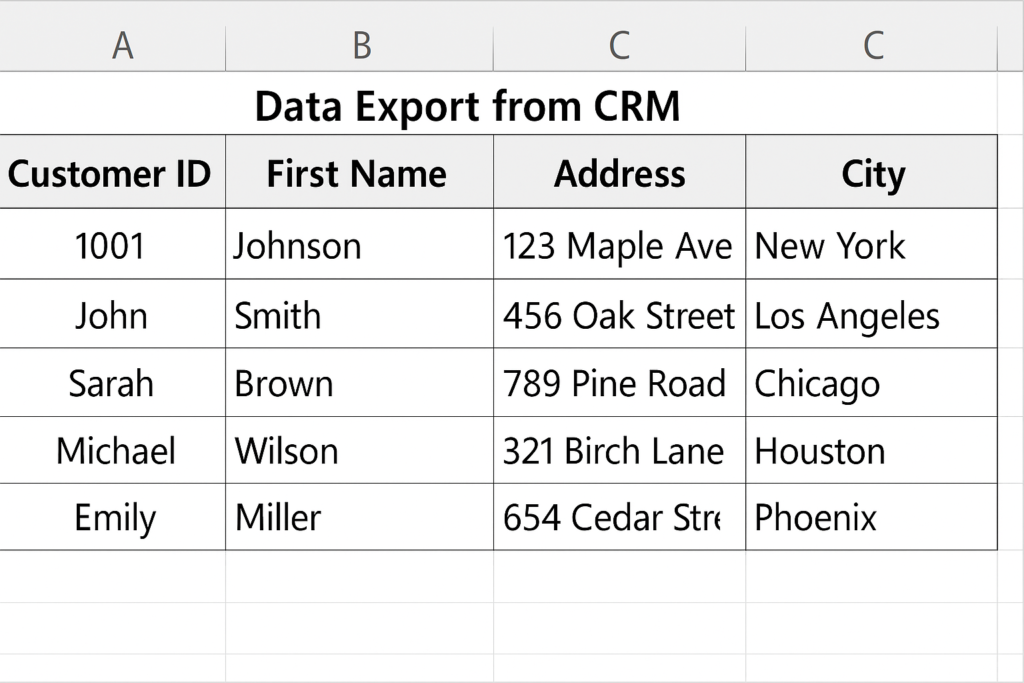
Example 2: Data Export from CRM
Exporting customer data from CRM software can cause names and addresses to be cut off in Excel. Expanding all columns makes every field visible. This helps avoid confusion and the need for manual retyping.
Benefits of Expanding All Columns in Excel
Improves Readability
Expanding columns makes it much easier to read long text strings and big numbers. This is especially critical in dashboards, reports, and presentations where clarity matters.
Professional Presentation
Clean, well-spaced data looks professional and builds credibility. When you send a file to a client, manager, or investor, expanded columns prevent awkward formatting. They also make your worksheet look better.
Avoids Data Misinterpretation
If content is hidden or shown as #####, it can lead to confusion or errors. Expanding all columns makes sure every value is clear and understood. This is important in financial and operational contexts.
Improves Printing Layouts
When printing Excel sheets, non-expanded columns may cut off text or misalign tables. Expanding columns helps in producing a clean and printable version of your spreadsheet.
Enhances Data Entry Accuracy
When all input fields are fully visible, users are less likely to make entry errors. This is useful in shared workbooks where multiple users input data.
Easily Expand All Columns In Excel At Once
FAQ’s
Why is my text in Excel getting cut off even when the cell is large?
Sometimes text gets cut off due to wrapped text settings or merged cells. Even if the row is tall, if the column isn’t wide enough, Excel may still hide content. Expanding the column ensures full visibility.
How can I automatically expand columns when new data is added?
Use Excel Tables. When you turn a range into a Table (Ctrl + T), Excel adjusts the column width. This happens when you add new rows, making it easier to manage dynamic content.
Can I expand all columns in Excel Online?
Yes, Excel Online supports AutoFit. Select the columns, right-click, and choose “AutoFit Column Width.” While some desktop features may be limited, basic expanding works similarly.
Conclusion
Expanding all columns in Excel is one of those small adjustments that make a big difference. It enhances readability, reduces confusion, improves presentation, and ultimately supports better data analysis. You can use the double-click method, ribbon tools, keyboard shortcuts, or VBA for automation. The important part is knowing when and how to use each method. By using these techniques, your spreadsheets will be functional, user-friendly, and professional.